Usage
This guide explains how to use the RenderEase Shopify Integration after installation — from requesting 3D models to configuring and publishing the “View in 3D” experience on your Shopify store.
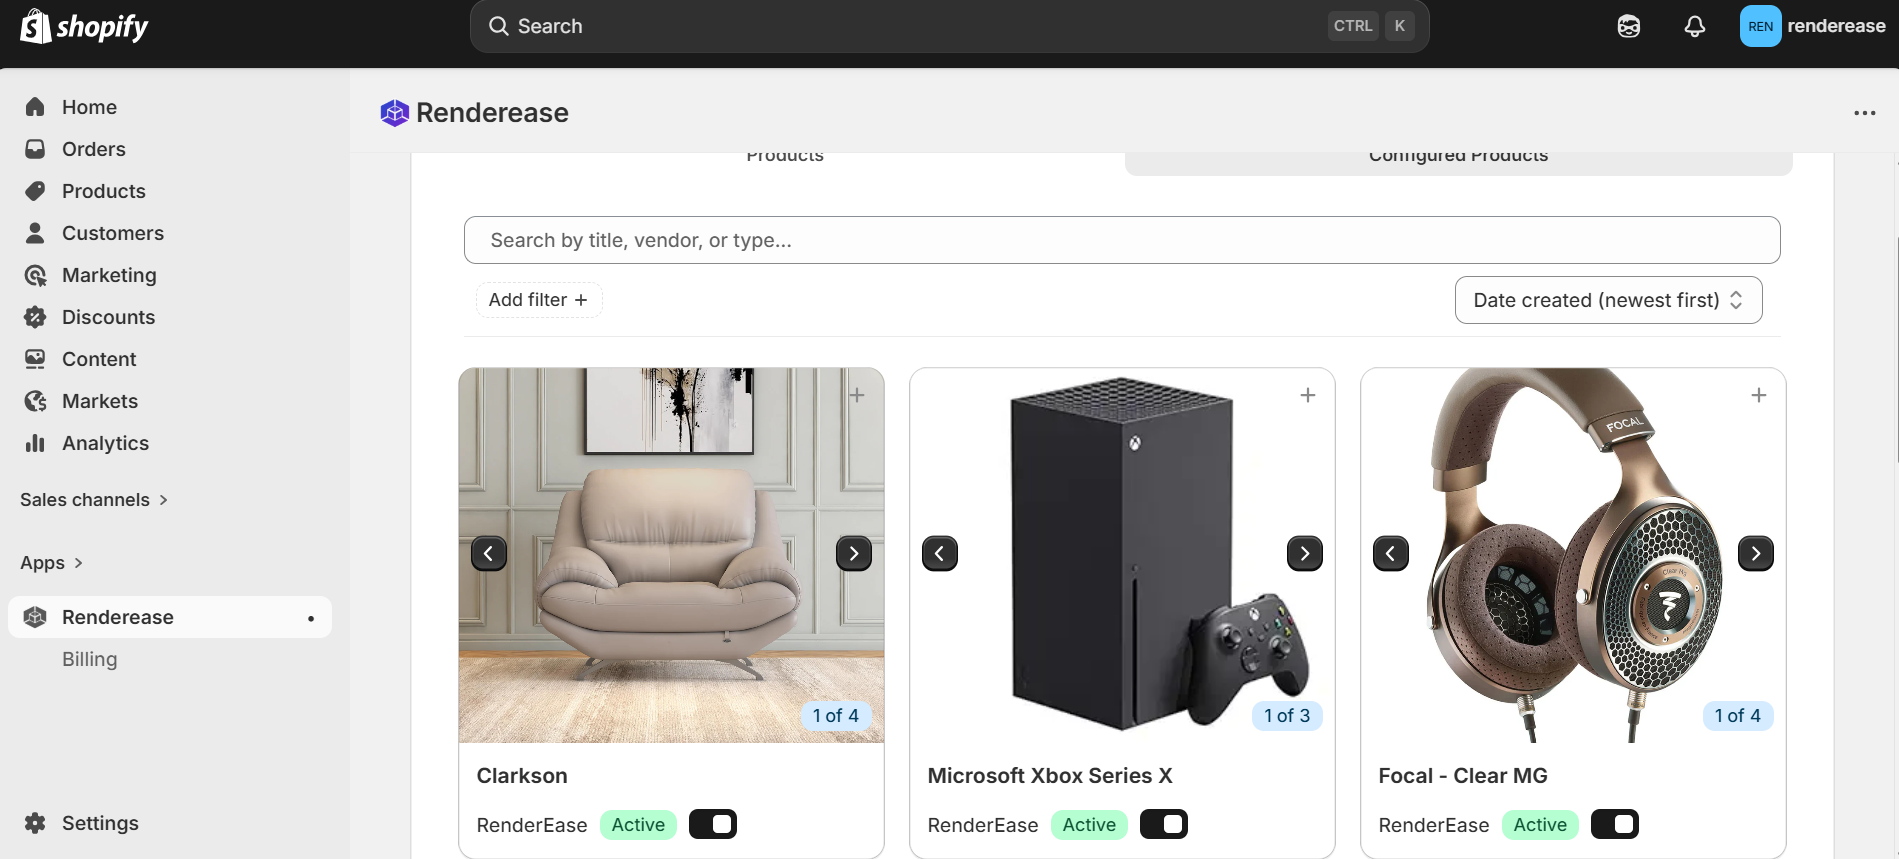
Step 1: Open RenderEase App in Shopify
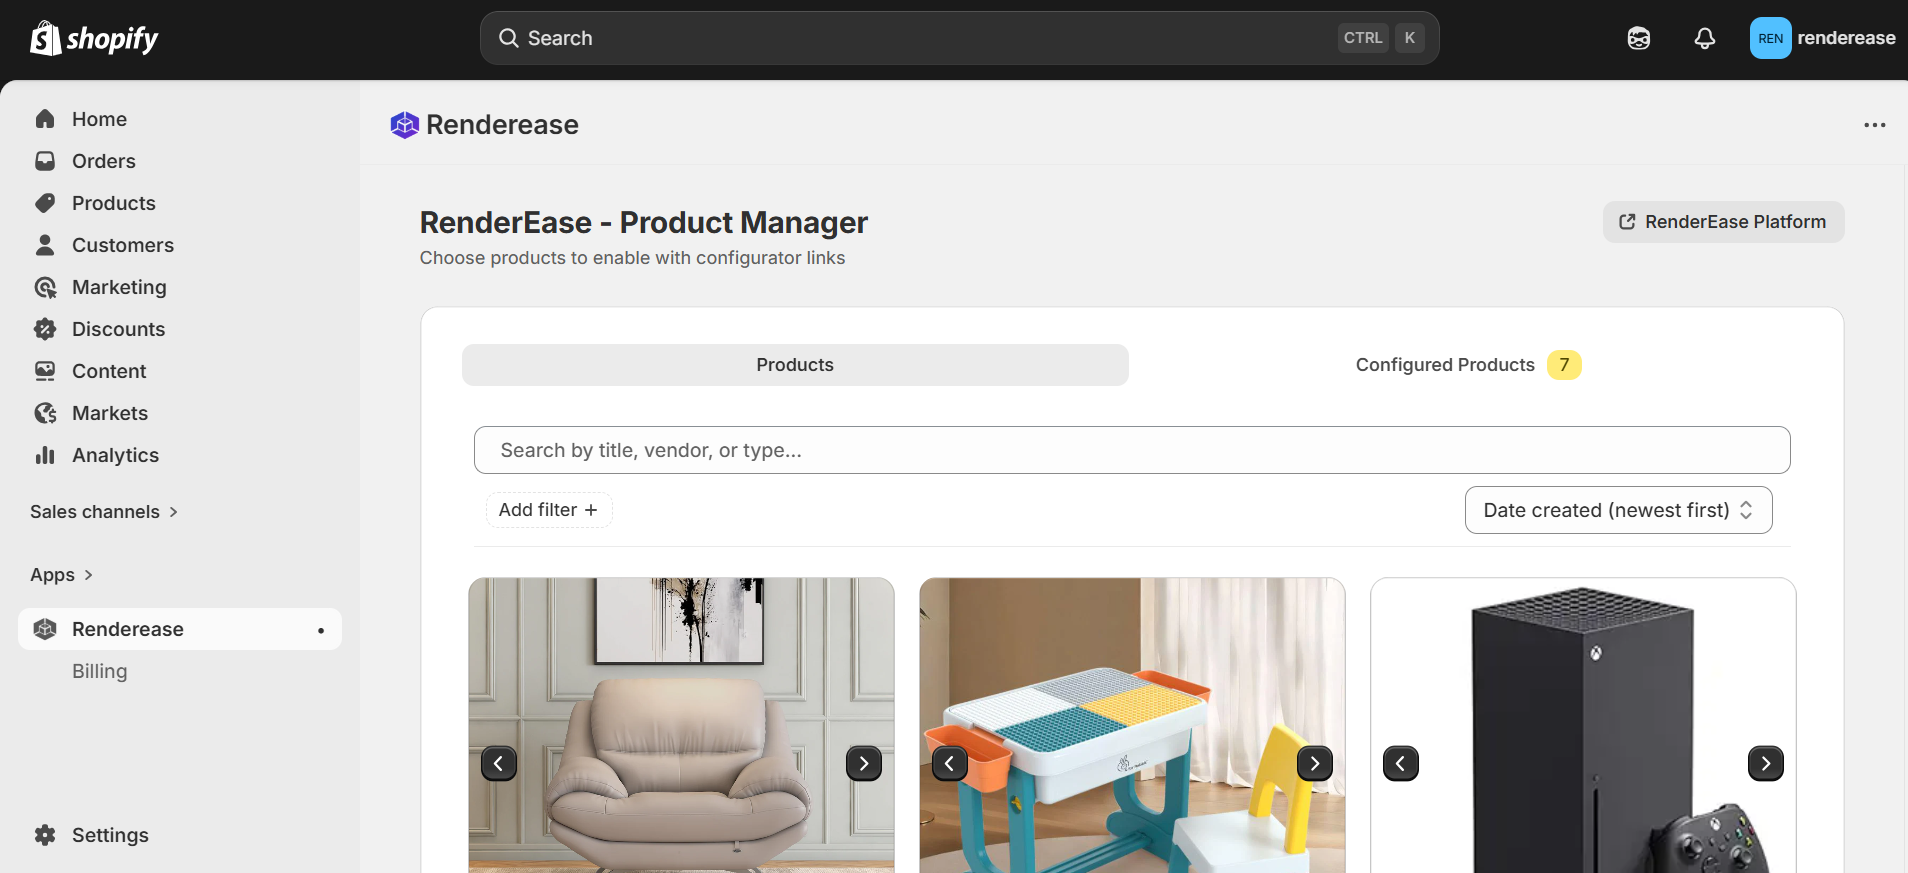
- Log in to your Shopify admin panel.
- Navigate to Apps.
- Click on RenderEase from the installed apps list.
You will be redirected to the RenderEase Product Manager, where all your Shopify products are displayed.
Step 2: Select Products and Send 3D Model Request
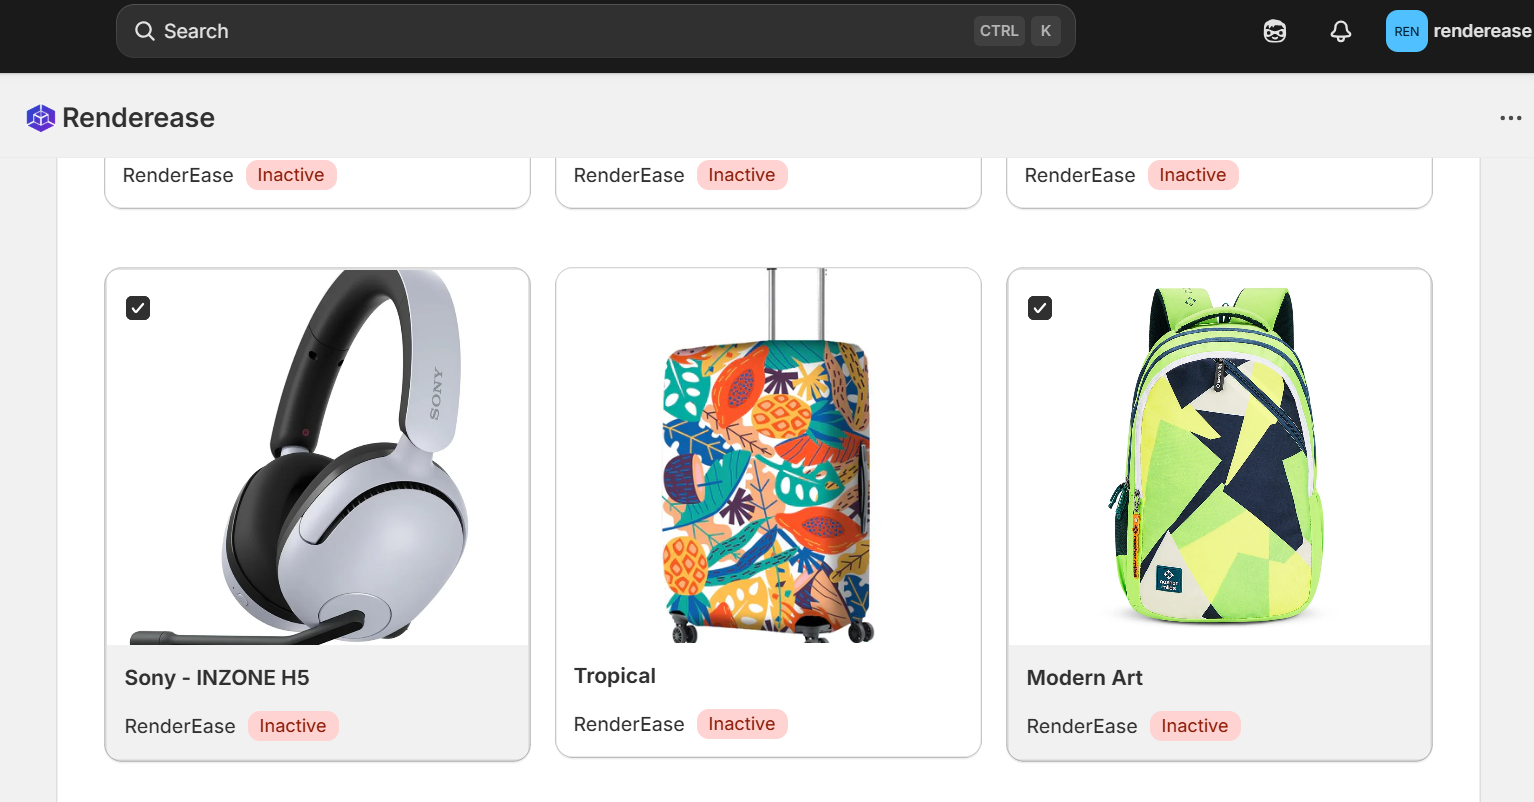
- From the product list, select one or multiple products using the checkboxes.
- Click on "Send 3D Model Request".
- A confirmation message will appear indicating the request has been successfully submitted.
- Click on "Go to RenderEase Platform" to continue.
This sends your selected products for 3D model creation.
Step 3: Track Requested Models in Digital Library
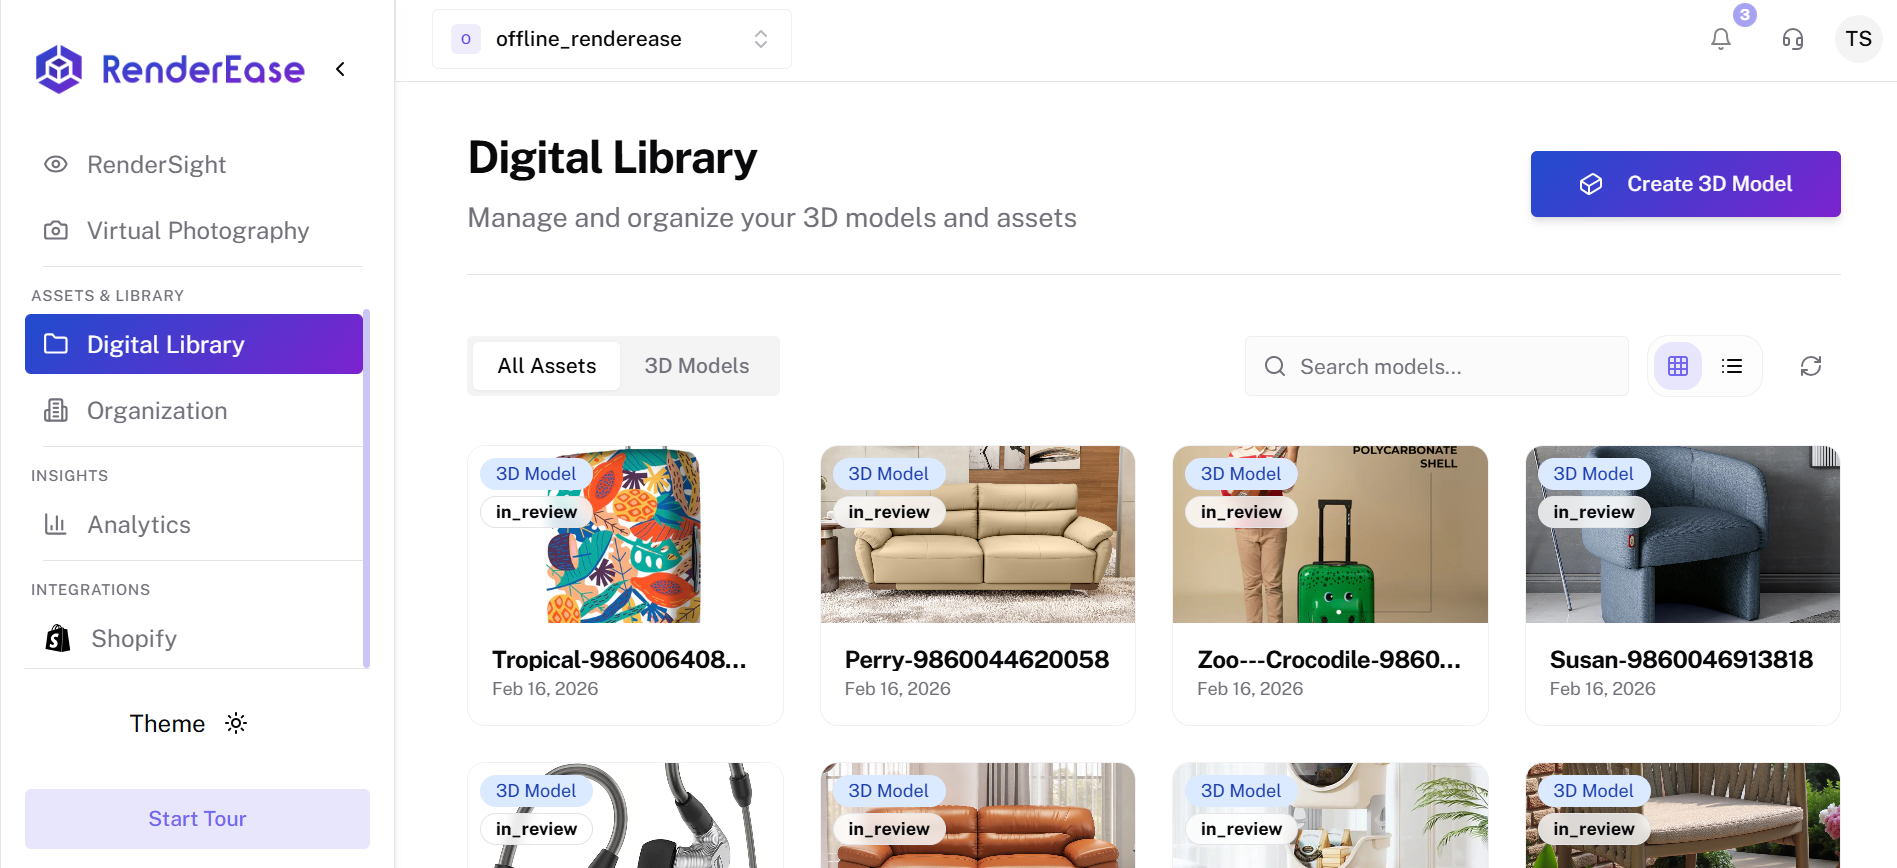
- Inside the RenderEase platform, click Digital Library from the left sidebar.
- You will see all requested products listed.
- Each product displays its current status:
- Requested
- In Progress
- Completed
This section allows you to:
- Track model creation progress
- View completed 3D assets
- Manage and organize your digital assets
Step 4: Create a Configurator Using Your 3D Model
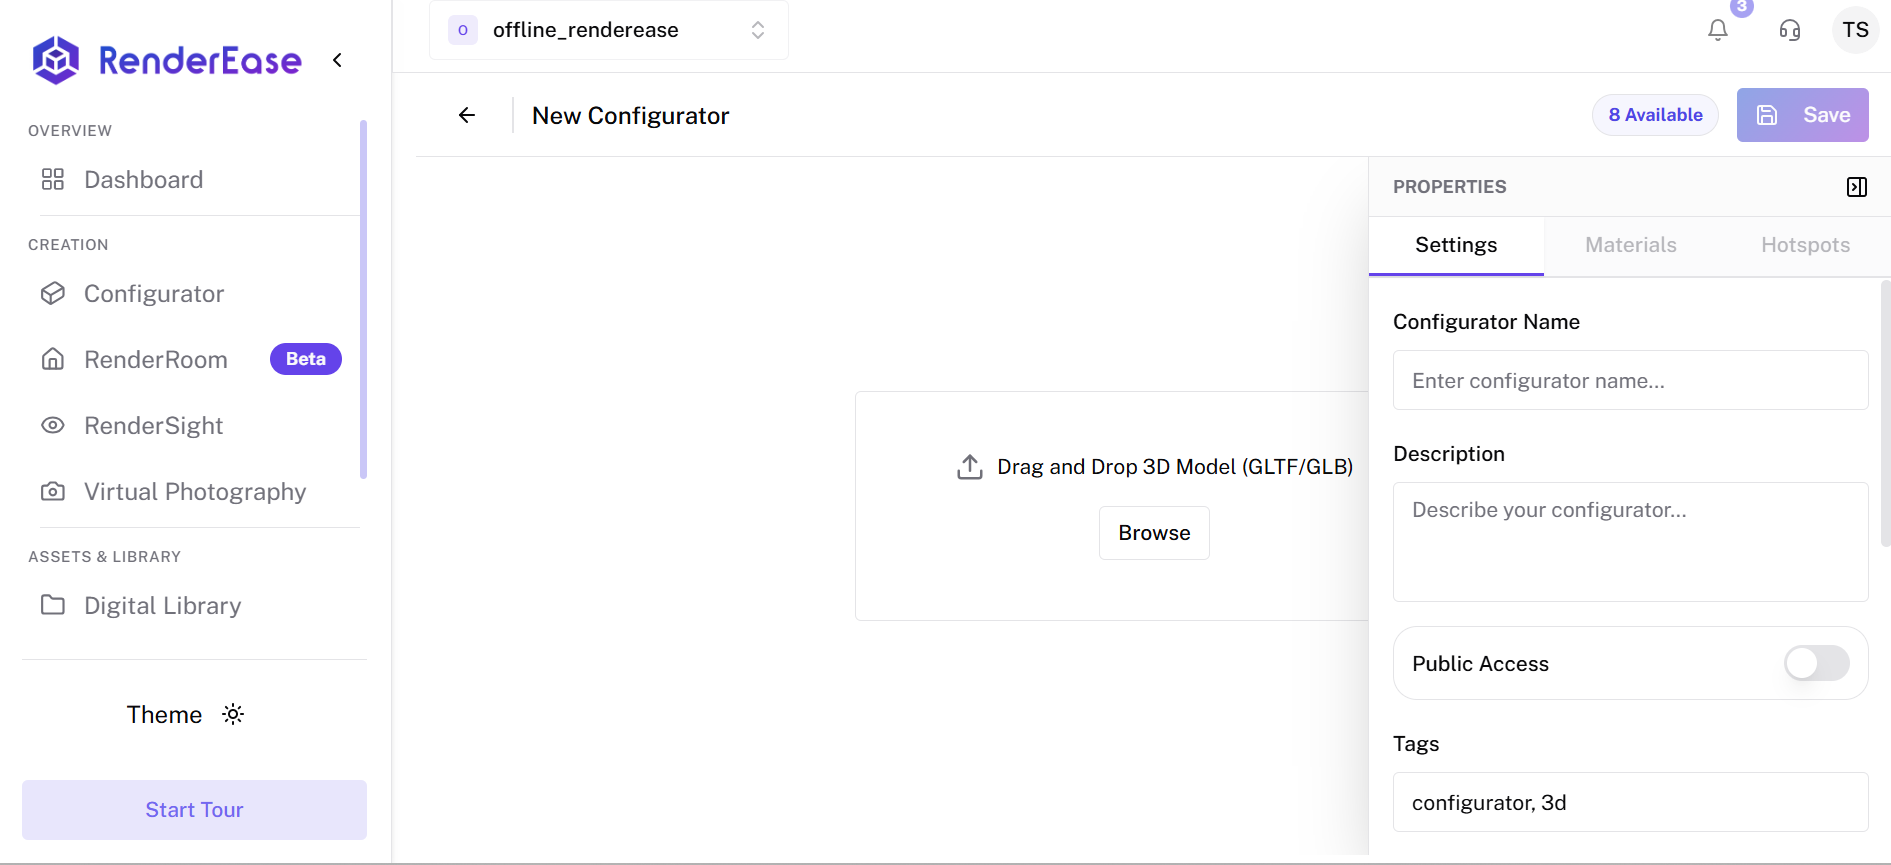
Once your 3D model is available:
- Navigate to Configurator from the sidebar.
- Click New Configurator.
- Upload your 3D model file (GLB/GLTF).
- Configure:
- Model settings
- Materials
- Variants
- Hotspots (if required)
- Save your configurator.
This step allows you to customize how your 3D product will behave and appear to customers.
Step 5: Add the "View in 3D" Button Using Deep Link
After creating the configurator:
- Go back to the Configured Products section.
- Click the "+" icon next to the product.
- This opens the deep-link editor page for adding the 3D button to your Shopify product.
Step 6: Customize the "View in 3D" Button
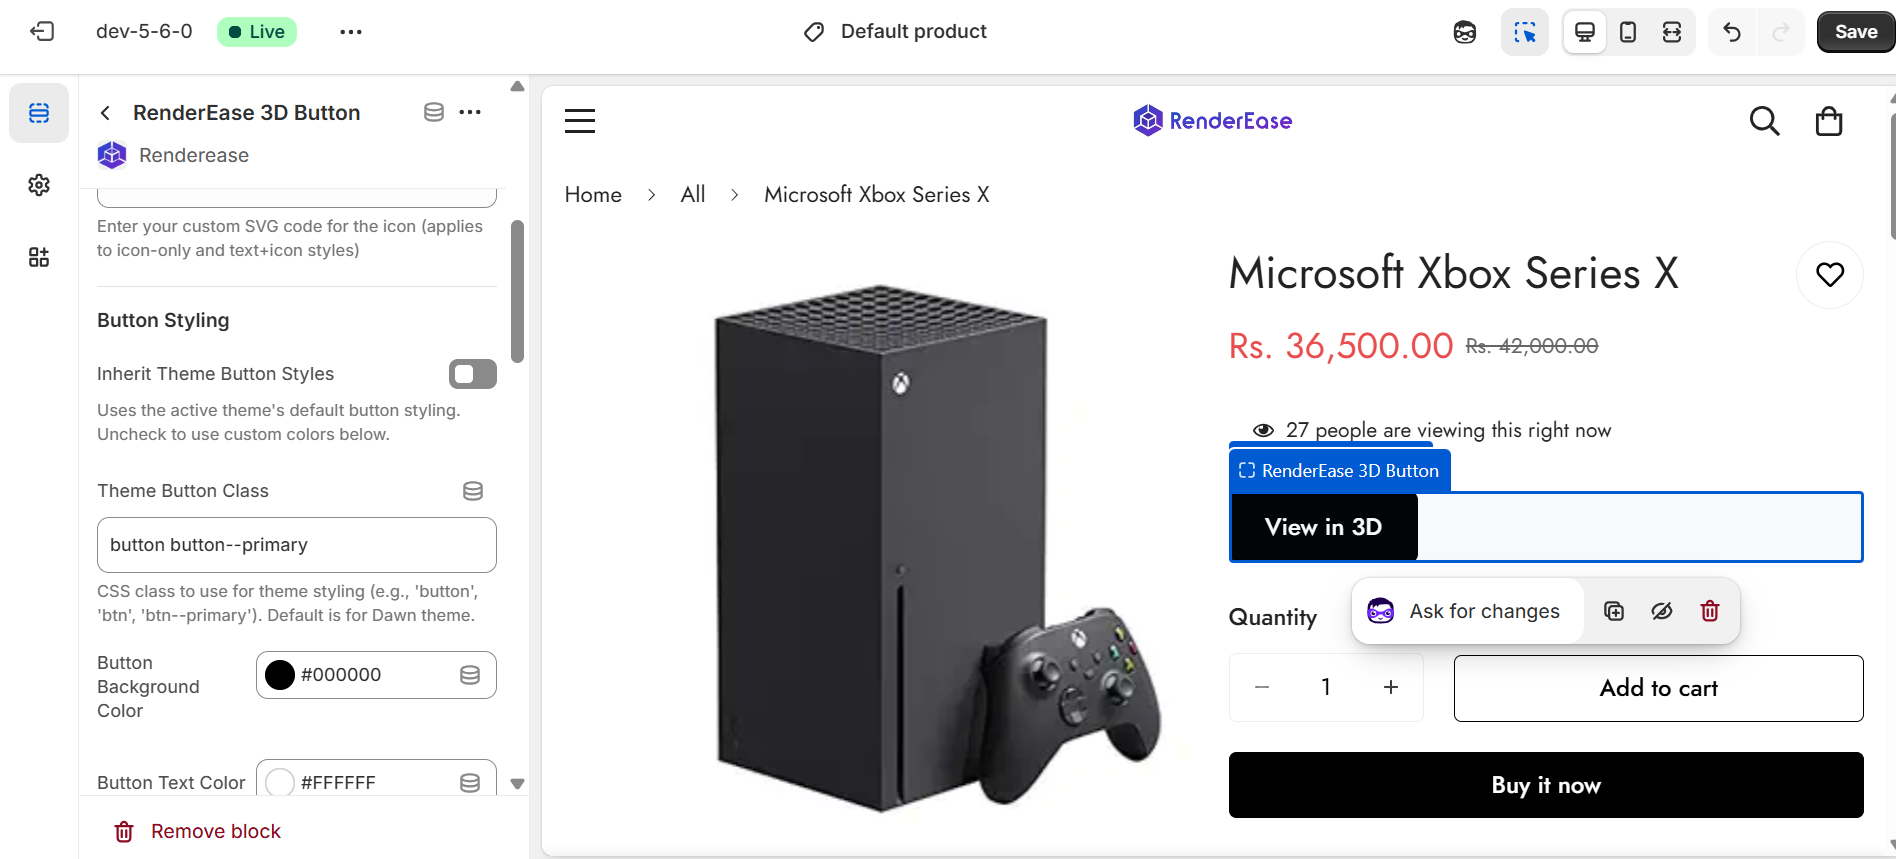
On the deep-link configuration page, you can customize:
Button Settings
- Button Display Type (Text only, Icon only, Text + Icon)
- Button Text (e.g., "View in 3D")
- Custom Icon SVG
Button Styling
- Inherit theme styles or use custom styling
- Theme button class
- Background color
- Text color
- Hover color
- Width (Full width or custom)
- Corner radius
Modal Settings
- Use product name as modal title
- Custom modal title
- Modal size (e.g., Full Screen 95% × 95%)
- Modal corner radius
Add to Cart Button (Inside Modal)
- Inherit theme styles
- Custom class
- Button text
- Background & hover colors
- Corner radius
After customization:
- Click Save.
- The 3D button will appear on your Shopify product page.
Final Result
Customers can now:
- Click "View in 3D"
- Open the interactive modal
- Rotate, zoom, and explore the product
- Add the configured product directly to cart
The Shopify Usage workflow is now complete.