Configurator Editor
Opening the Editor
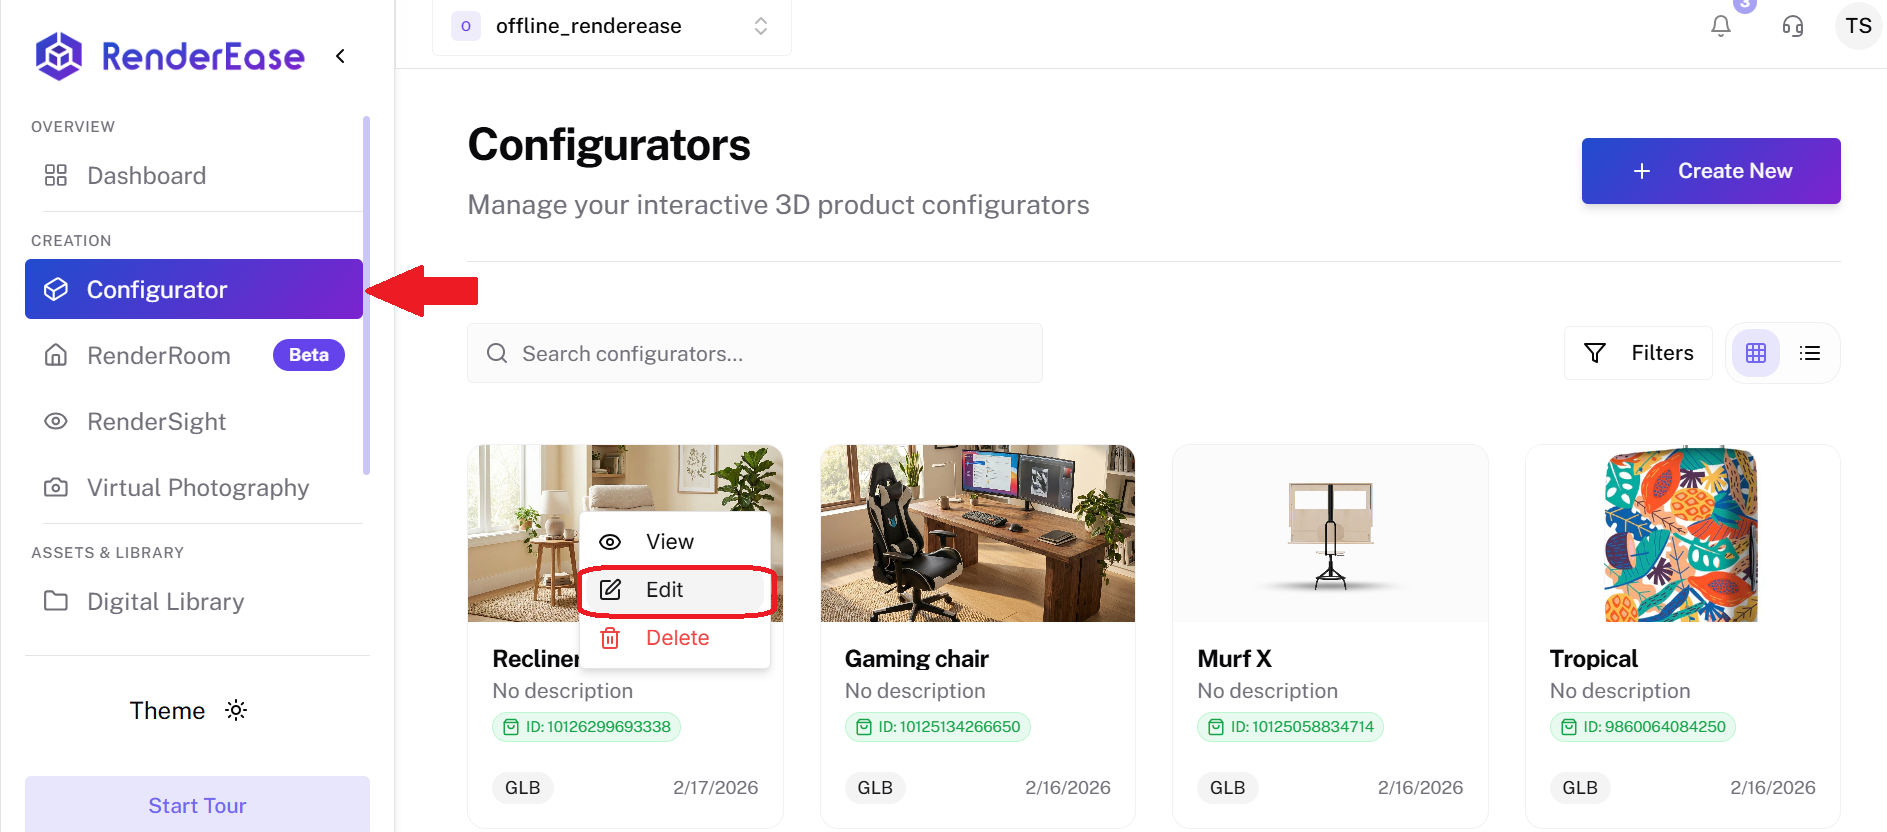
To open the Configurator Editor:
- Navigate to the Configurator section in the platform dashboard.
- Locate the configurator you want to modify.
- Hover over the configurator card.
- Click the three dots (⋮) menu on the card.
- Select Edit.
The selected configurator will open in the Configurator Editor, where you can begin making changes.
Editor Interface Overview
The Configurator Editor interface is divided into several sections to help you efficiently manage different aspects of the configurator.
The main components include:
-
3D Viewport (Center) Displays the interactive 3D model where you can preview all changes in real time.
-
Properties Panel (Right Side) Contains configuration tabs for editing settings, materials, and hotspots.
-
Scene Controls (Left Side) Provides navigation tools for interacting with the 3D scene.
-
Update Button (Top Right) Saves and applies the changes made to the configurator.
These components allow you to modify and preview the configurator simultaneously.
Settings Tab
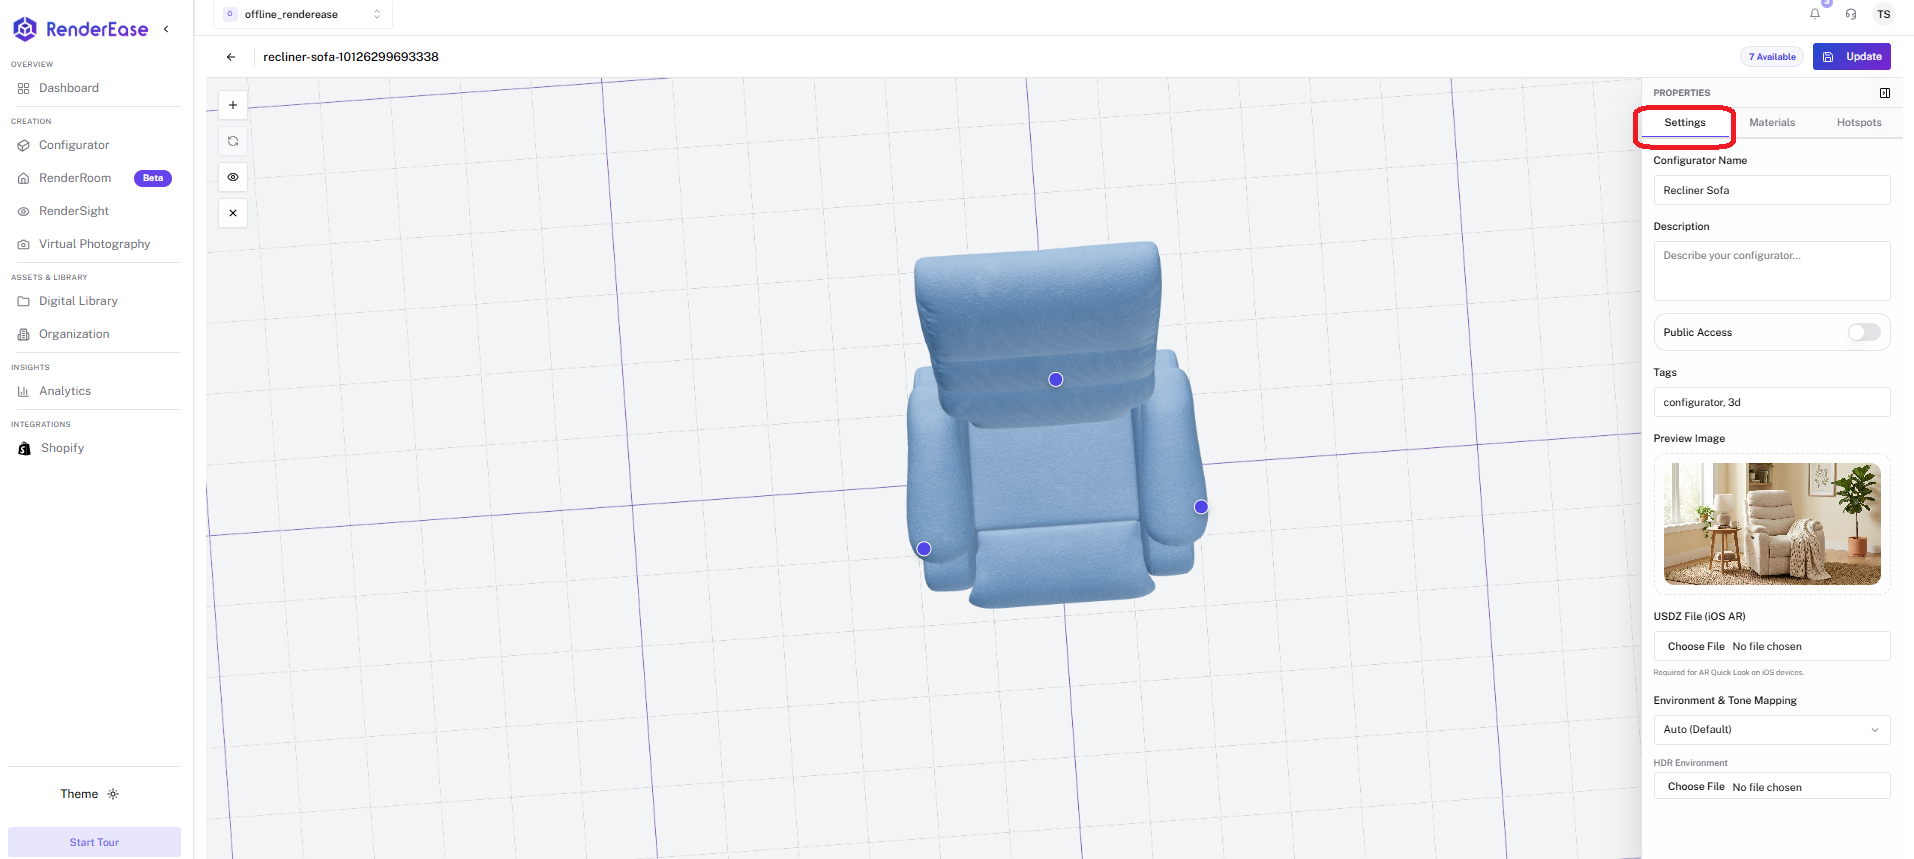
The Settings tab allows you to configure the general properties of your configurator. These settings control how the configurator is displayed and accessed.
You can modify the following options:
-
Configurator Name The display name used to identify the configurator.
-
Description A short explanation describing the configurator or product.
-
Public Access Toggle Controls whether the configurator can be accessed publicly.
-
Tags Helps categorize and organize configurators for easier management.
-
Preview Image The thumbnail image displayed for the configurator within the dashboard.
-
USDZ File (for iOS AR) Upload a USDZ version of the model to enable Augmented Reality viewing on iOS devices.
-
Environment & Tone Mapping Controls lighting and visual tone adjustments for improved rendering.
-
HDR Environment Applies high dynamic range environments to create realistic lighting and reflections.
After making any changes, click Update to save and apply them.
Materials Tab
Materials Configuration Tutorial
The Materials tab allows you to customize the visual appearance of your 3D model by adjusting textures and surface properties.
Each material controls how a specific part of the model looks, including color, texture, lighting interaction, and surface details.
For each material, you can configure:
-
Base Texture Defines the primary color or pattern applied to the model surface.
-
Normal Map Adds surface detail and improves lighting realism without increasing geometry complexity.
-
Occlusion Map Enhances shadow depth in areas where light is naturally blocked.
-
Height Map Creates additional surface depth and detail.
-
Part Name Assignment Allows materials to be mapped to specific parts of the 3D model.
-
Material Preview Changes can be previewed instantly in the 3D viewport.
Using the materials tab, you can create different product variations such as:
- Color options
- Fabric or leather types
- Surface finishes
- Custom product configurations
After making changes, click Update to apply them.
Bulk Upload
The Bulk Upload feature allows you to upload multiple texture maps simultaneously.
Supported uploads include:
- Base textures
- Normal maps
- Occlusion maps
- Height maps
This feature significantly speeds up the process when managing complex models with multiple materials.
After uploading the files, click Update to apply the textures to the configurator.
Hotspots Tab
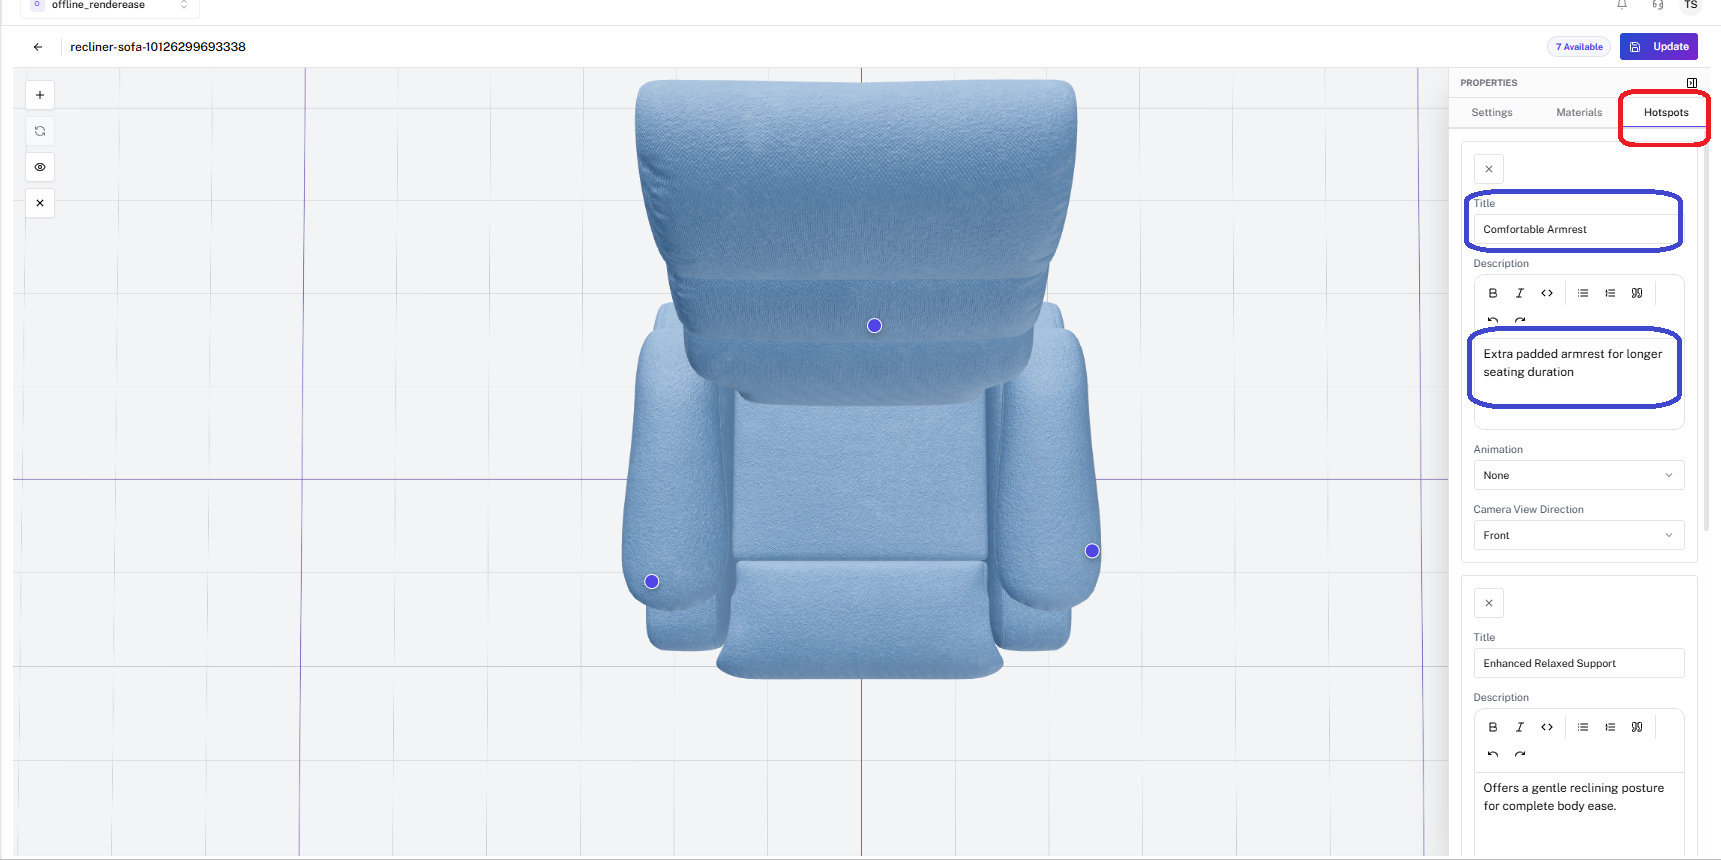
The Hotspots tab allows you to place interactive markers on the 3D model to highlight specific product features.
Hotspots provide contextual information that helps users better understand the product.
Each hotspot can be configured with the following properties:
Title The heading displayed when the hotspot is activated.
Description (Rich Text Supported) Detailed information shown in the hotspot popup. Formatting such as bold text and lists can be included.
Animation Type Controls how the hotspot appears or behaves when triggered.
Camera View Direction Defines the camera position when the hotspot is clicked. The model automatically rotates or adjusts the camera to focus on the highlighted area.
Hotspots are commonly used to highlight:
- Key product features
- Important functional components
- Unique selling points
- Product specifications
These interactive elements improve product understanding and increase user engagement.
After adding or modifying hotspots, click Update to save your changes.
Saving Changes
Once you finish editing the configurator:
- Click Update in the top-right corner.
- The configurator will be updated with the latest changes.
- If the configurator is connected to integrations such as Shopify, the updates will also be reflected there.
The Configurator Editor enables you to create highly interactive and customizable 3D product experiences that can be embedded into websites or integrated with e-commerce platforms.